Do you encounter a common WordPress error on your site?
Want to fix these WordPress errors yourself? Most of these errors can be fixed by following some simple steps.
In this tutorial, I’ll show you step by step how to fix WordPress errors.
1. Disable all installed plug-ins on your website
Often, errors are caused by plug-ins that conflict with each other, with your theme, or with WordPress itself.
The easiest way to fix these errors is to disable all WordPress plugins. Then you can re-enable these plug-ins one by one to see when the error occurs again.
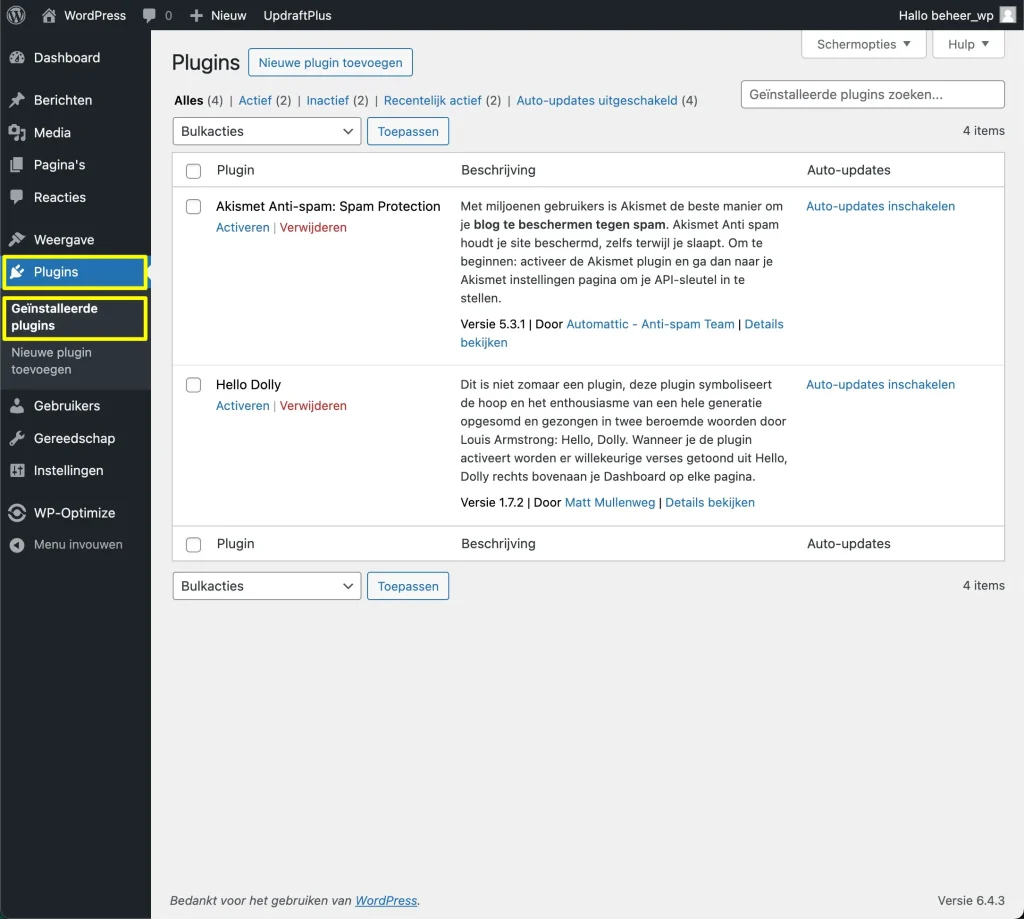
If you have access to the administrator area of your WordPress site, just go to the plugins page.
First, you need to select all plug-ins, then select “Deactivate” from the “Bulk Actions” drop-down menu. Click the Apply button to deactivate all selected plug-ins.
Some errors can make it impossible to access your WordPress admin area. If so, you can deactivate your plug-ins in 2 ways:
- Via FTP
- Through the management environment of your hosting
Plugins de-activated via FTP
To get started, connect to your WordPress hosting files using an FTP program. If you haven’t used FTP before, see my guide on how to use FTP to upload files to WordPress.
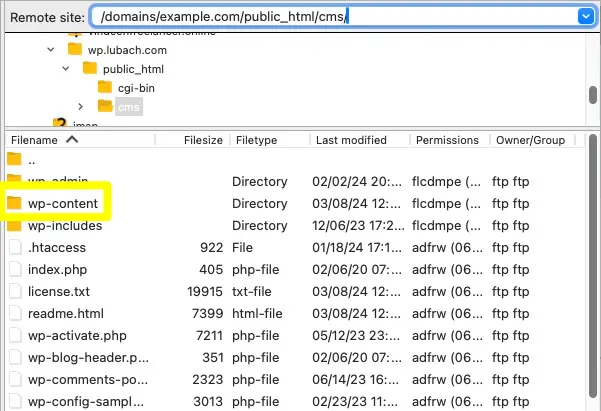
Once you have connected via FTP, open the ‘wp-content’ folder.
Plugins de-activated via your hosting’s management environment
A web hosting management environment is an online environment where you can manage and configure your web hosting account. This environment offers an array of tools and features that allow you to manage various aspects of your hosting account without requiring in-depth technical knowledge.
The most common management environments for web hosting are cPanel, Plesk and DirectAdmin.
These management environments usually provide a file manager that allows you to view, edit, upload and delete files on your hosting account, allowing you to access your files directly from your browser without having to use an FTP client.
Rename plugins folder
Once you are in ‘wp-content’ you will see a folder called ‘plugins’.
You can now either Ctrl+click or right-click on this folder and select ‘Rename’.
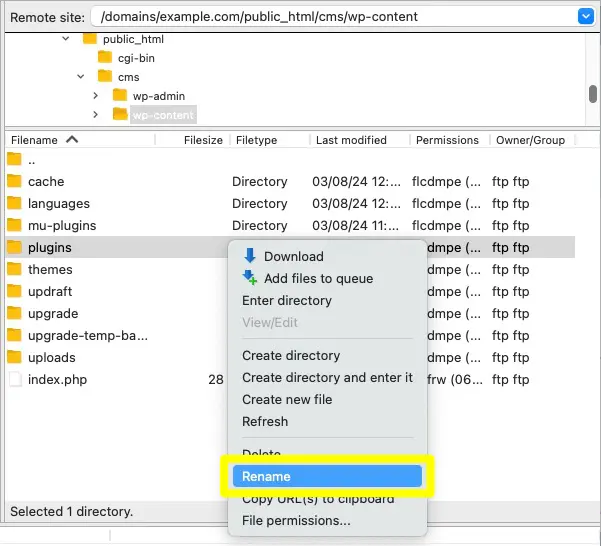
After you have done that, rename this folder to ‘plugin.deactivate’. This will deactivate all your WordPress plugins.
For detailed instructions, check out my article on deactivating all plugins when you don’t have access to wp-admin.
After deactivating your plugins, check if the problem still occurs on your website or WordPress blog. If your site works perfectly now, you know the problem is plugin related.
You can now easily reactivate your plugins one by one to see when the problem occurs again.
To get started, go to Plugins ” Installed plugins. You can now find the plugin you want to reactivate and click the ‘Activate’ link.
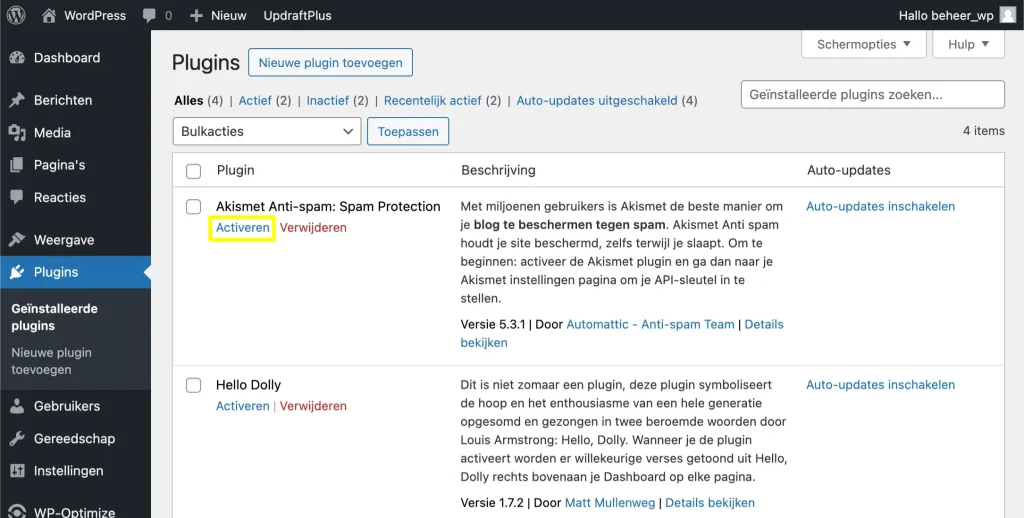
When the problem occurs again, you will know which plugin is causing the problem. To solve it, you have a number of options:
- See if an update is available for the plugin.
- Contact the creator of the plugin.
- Uninstall the plugin and find a better alternative.
2. Switch to a default WordPress theme
Sometimes your WordPress theme can cause problems on your site. To find out if your theme is causing the problem, try switching to a standard WordPress theme such as Twenty Twenty-Four.
Since these themes are created by the official WordPress team, they are less likely to cause conflicts or contain bugs compared to some other third-party themes.
To switch to a default WordPress theme, go to View ” Themes.
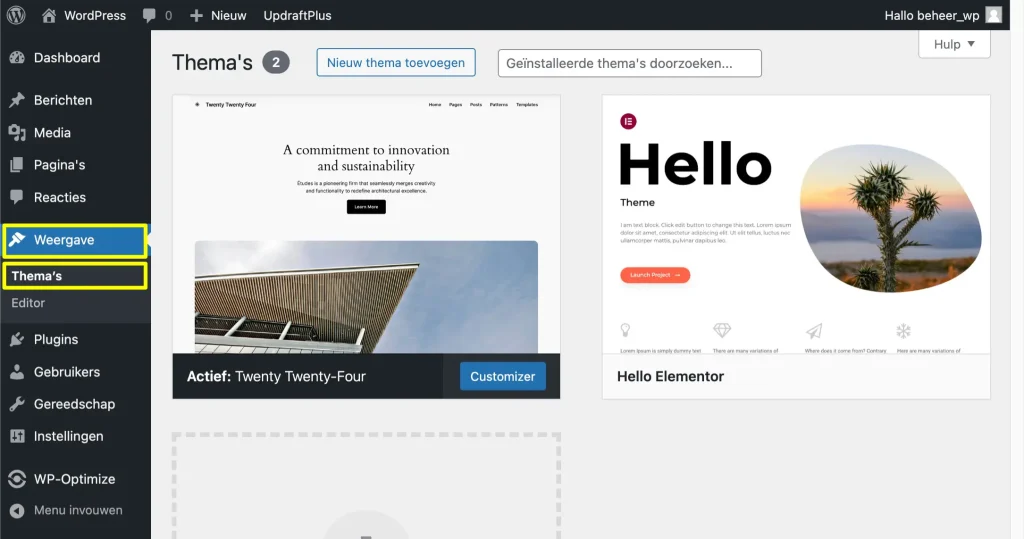
Then you can mouse over one of the default themes.
Then simply click the “Activate” button.
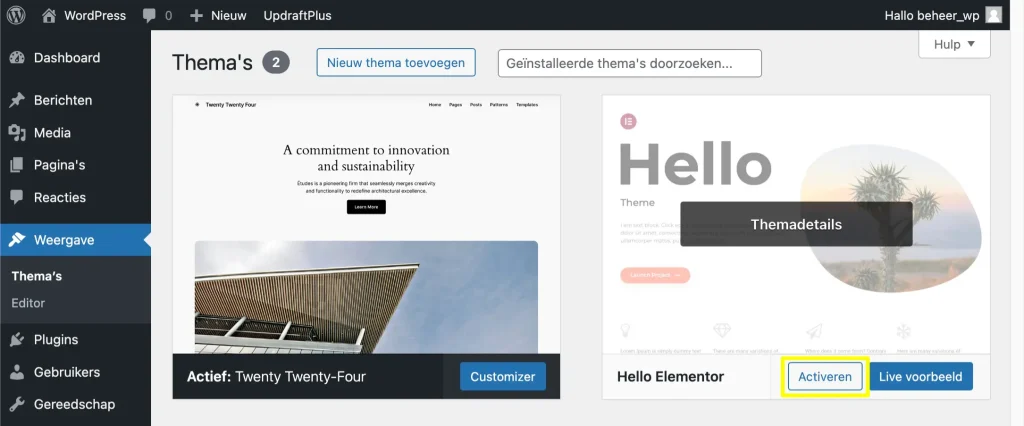
If you cannot log into your WordPress site’s administration environment, you can switch to a default theme via FTP.
First, connect to your website using an FTP client. After you’ve done that, go to the ‘/wp-content/themes/’ folder.
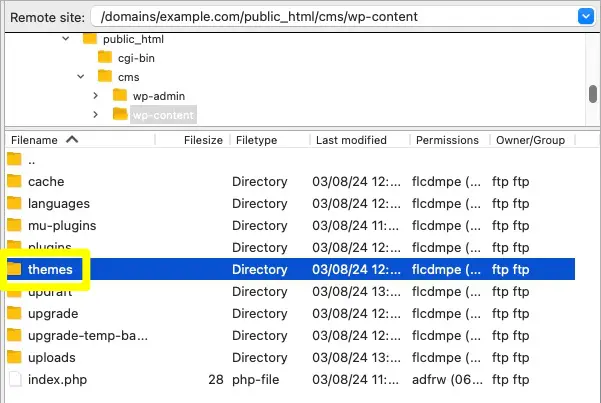
In this folder, you will see all the themes installed on your WordPress website.
Before making any changes, it’s a good idea to download a copy of your current active theme. This will make it easier to restore your theme after running this test.
To download your currently active theme, simply locate the folder with the name of this theme. Then click with the Control button pressed or right-click on this folder.
Then select “Download.
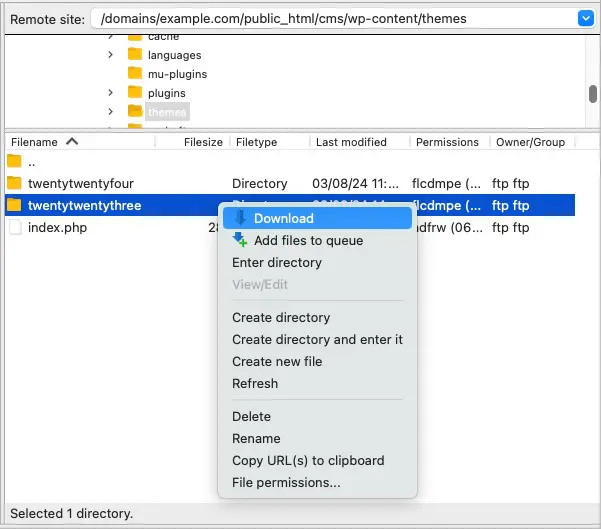
After you download this folder, you can go ahead and delete any theme within your FTP client, except a default WordPress theme such as Twenty Twenty-Two.
Since your active theme is no longer available, WordPress will automatically switch to using the default theme.
If this fixes the error, then you know your theme caused the problem.
If this is the case, we recommend finding a new theme for your WordPress website. To help you out, we’ve posted our expert picks for the best responsive WordPress themes.
If this does not solve the problem, you can restore your original theme. The easiest way is to use the copy you downloaded to your computer. For more detailed instructions, please refer to our guide on how to use FTP to upload files to WordPress.
3. Renew Permalinks
WordPress uses an SEO-friendly URL structure. Sometimes this permalinks structure is not updated or not set properly, which can result in unexpected 404 errors on your site.
If you get 404 errors, you can try regenerating your links, which will rebuild and fix your permalinks structure. You can do this with the click of a button, without changing anything on your WordPress website.
To re-generate your permalinks, go to Settings ” Permalinks.

Now go all the way to the bottom of this page and click “Save Changes.
After a few moments, you should see a message that WordPress has updated your permalinks structure.

For more information, check out our complete guide on how to refresh your permanent links in WordPress.
4. Backup and Delete .htaccess File
Are you getting an internal server error? A corrupted .htaccess file may be the cause.
The easiest way to fix your .htaccess file is to delete it. WordPress will then automatically create a new .htaccess file.
To delete your current .htaccess file, connect to your site using an FTP client. You’ll find the .htaccess file in your site’s root directory.
To get to this root folder, simply open the folder that displays the name of your website.
Next, go to the ‘public_html’ folder.
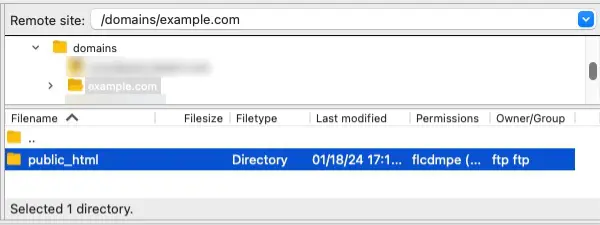
You will now see your .htaccess file in this folder.
If you don’t see .htaccess, your FTP client may be set to hide sensitive files. For more information, check out our article on why you can’t find the .htaccess file on your WordPress site.
Before you do anything, it’s a good idea to make a copy of your current .htaccess file. If something goes wrong, you can easily restore your original file.
To download your .htaccess file, click on it and then select “Download.
You will now see your .htaccess file in this folder.
If you don’t see .htaccess, your FTP client may be set to hide sensitive files.
Before you do anything, it’s a good idea to make a copy of your current .htaccess file. If something goes wrong, you can easily restore your original file.
To download your .htaccess file, click on it and then select “Download.
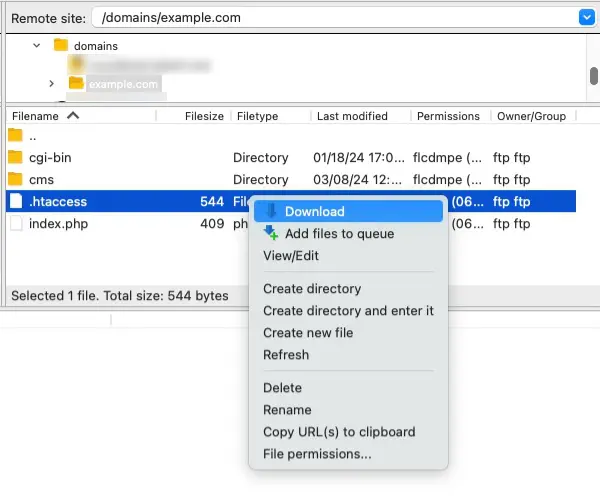
After you’ve done that, you can go ahead and delete the original .htaccess file in your FTP window. After that, go to Settings ” Permalinks in your WordPress management environment.
Finally, click the save changes button. WordPress will now create a new .htaccess file for your website.

